Monday, October 27, 2014

ANTLERS: AN UNUSUAL PAINTING SURFACE

SOME ANTLERS ARE TOO BEAUTIFUL TO COVER...
THEY ARE LIKE FINE IVORY.
But if you live in an area frequented by deer, you might find their antlers shed in or near trees. You can also buy antlers on eBay!
 
antler, Guhin, project
A found object.
I'm unlucky enough to live in an area well-trafficked by hunters,
but I do often find antlers. When I wished to use some of them in a
decorative painting project, I tinted gesso with yellow oxide or simply
used the white gesso. Gesso is a primer that helps the paint to stick.
 
project, decorative


project, Guhin
Colored gesso is the first layer here.
 Guhin, project
I used stencils and spray paint on this example.


For an ombre or gradient effect I used spray paint in black, copper metallic, & brown.
I also masked off areas
with a stencil.

Another idea, especially if the antler is textured with ridges and bumps in places, is to drybrush over them with a contrasting color!
Or try gold leaf!

paint, acrylic
I prepared to do the stripes in the example below by adding
masking tape and burnishing it down thoroughly before
painting an area. I wished for some natural antler-color to show
in some places. I also wanted to include some Native
American-like symbols, drawn on with paint marker
 afterward. NOTE: When creating stripes next to
each other, let dry and seal with matte medium
first, before taping. This intermediate layer helps
keep tape from peeling off some of the acrylic paint.
 
Guhin, copyright
Always let dry thoroughly between additions.
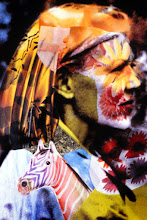
Guhin, project
Altered Art
decor, decorative, Guhin
Ancient symbols add interest.


Seal when dry, using clear acrylic medium to help preserve your masterpiece.


Thursday, October 16, 2014

A FRIGHTFULLY FUN PROJECT


"Boos and ghouls" (boys and girls) of all ages enjoy this Halloween activity for kids,
Halloween
Frightfully clever!
...it's so easy it's scary. Create "bootiful" kaleidoscopes!
Note: If you would rather engage in a less, um, spirited project, use autumnal motifs such as gourds, apples, pears, wheat, and (of course) fall leaves. 

project, lesson, student
No trick...it's a treat!


activity, teacher
Add this to your bag of tricks!


First, gather assorted colors of bright art paper or construction paper in orange, brown, tan, yellow, red, gold, and yes, even gray, white and black.
  1. Cut the paper into 6" and 9" squares, enough for at least three or four pieces in different colors for each kaleidoscope.
  2. Fold a 6" piece twice, down to a 3" square. Draw a shape on it so big that it "touches" the sides of the square. (The "hinges" on the folded sides will hold the shape together later.) Bones, spiders, skulls, witches, ghosts, black cats, bats, and jack-o-lanterns are motifs that might not be allowed in some homes or schools, but other little goblins usually love them. 
  3. Scissors will do for the young artist to cut around the shape, leaving the folds uncut. If the artists are mature enough to handle craft knives properly, they should also cut openings within the shapes to add interest: eyes, mouths, and other open-work. Because the square stays folded, the cutter must press hard to go through all the layers. Use an old magazine or a thick pad of newspapers underneath, of course.
  4. When the cut paper is opened up, it looks very different! Now do two or three others, in other colors and shapes. Then try them overlapped behind or in front of the first.
  5. Finally, as a background, use a solid (uncut) 9" square or larger of yet another color. Plan first and glue later, rotating the pieces and trying different layer combos to achieve the most pleasing arrangement.

Saturday, October 11, 2014

FREEBIES ! CONTEST FOR FOLLOWERS! BLOG CANDY!

NOTE: CONTEST IS NOW CLOSED.
This giveaway features not one, not two, but THREE prizes, one each for three lucky winners.
All you have to do is follow this blog
and leave a brief comment at this post.
giveaway, win
Win this freebie!
 
First up, a Powerpoint presentation on disk called "Using Acrylic Paint."  (The artist is extremely talented.)  


Another prize, another Powerpoint on disk,
"Drawing with Pencil."   It's all about
creating realistic drawings.

blog+candy, free, contest     
Or snag this prize!
Finally, a CD-ROM with 8 projectable art posters,
perfect for the visual art educator!
It includes the principles of design and is a great learning tool.
free, freebie, giveaway
Project or print out these principles.
These are brand new, used only once for review purposes. The names of the three winners will be announced at the next post for Mixed Media Manic. If you participate, be aware that I will need your USPS mailing address (privately). In-country only, please. 

THANKS!


Sunday, October 5, 2014

EASY PAPIER MACHE SPIDER FOR HALLOWEEN

YEP. THIS SPIDER PROJECT IS FOR KIDS.
(OR ADULTS WITH WAY TOO MUCH TIME ON THEIR HANDS!)
 
I won't go into all the specifics about newspaper strips dipped in wallpaper paste. You've known the how-to since you were a child. But I will recommend two balloons for the armature, although they are slippery and two balls of newspaper are easier to handle. You can also tape the latter together before you even begin with the pasty strips.
 
(Balloons are smoother, of course, but who wants to wait until the two pasty spheres dry before you join them together?)
 
When ready to attach the bent wire legs, push them way into the dry body and tape them well.  Finish with a fine layer of small pieces of paper toweling, covering the taped legs as well. When that's dry (the next day), paint and add eyes.
kids, Halloween, holiday
Paint markings on the spider's back if you want to!
See more holiday postings at these links: Creepy Sunnies, and Day of the Dead.
 
mixed-media
skeleton  costume, mask

HAPPY HALLOWEEN!
 Guhin