Thursday, April 18, 2013

PLAYING WITH PAPERS AND PICTURES - Altered Art Mixed Media Techniques

Let's Color, Kids!
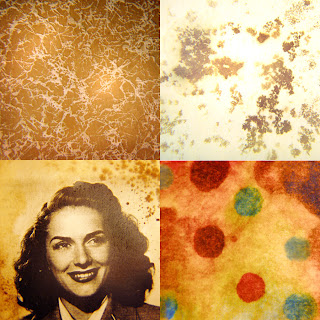
Altering papers and printed images to use in collage is easy: Stain, paint, tear, stitch, dye, burn, bleach, or scratch them for effect. Of course you can create dimensional paper, too, by folding, pleating, crumpling, and more.

paper techniques
Rolled, crumpled, creased, pleated, scored.


altering paper, art techniques
Strong coffee, wet tea leaves, walnut crystals, alcohol ink.


Tip:   I saturate papers with rubbing alcohol before applying alcohol inks. Then I immediately soften and spread the ink with a brush or piece of felt dipped in rubbing alcohol.

collage papers
The finished papers after colorizing them.
Alter lab-processed photographs with laundry bleach. This is not an archival technique, but it's fun! Try a gel bleach pen or a cotton swab dipped in liquid bleach. Apply it selectively to lift areas of color. When you've achieved the desired effect, rinse the print under lukewarm tap water and blot dry with a lint-free cloth. (Note that some papers and pigments resist bleaching action. Also, take all the necessary health precautions when working with bleach.)
 
bleaching and scratching
Bleached spots at left, scratched selectively at right.


Abrading a surface lends an aged, distressed appearance. To scratch the emulsion of a commercially-processed photograph, soften it in a tray of warm water for a minute. Blot it on a hard, flat surface and scrape away with a large needle, nail, or other scratch tool. Sandpaper removes large areas quickly. The light-colored marks show up best in dark areas of the photo.

And finally, do try this: Décollage is an art term that refers to a cutting and tearing technique based on the appearance of layered posters on billboards. The result leaves shredded papers, revealing portions of the images and text underneath.

mixed media collage
Decollage example


art blog, Paula Guhin

Saturday, April 13, 2013

Heritage Art & Collage/Paintings

Old photos, especially portraits, have a way of capturing the imagination. In this post you'll find four artworks using vintage portrait imagery along with paint, art papers, text, shallow objects, and more.
mixed media
Scruffy old paint brushes were incorporated!
While I love bright colors, sometimes only muted ones will do. 
The example below just cried for soft, neutral tones.                           

altered art, vintage imagery
A rusty baking pan (sealed) served as the substrate & frame.

mixed media, vintage image       
collage, mixed media
Collage/Paintings by P. Guhinart blog

mixed media

(Tactful feedback is appreciated.)

Saturday, April 6, 2013

HOW TO MAKE A COLLAGRAPH PRINTING PLATE


A printmaking plate can be created much 
as is a collage, by gluing relatively 
flat materials to a surface. 

The resulting prints are called collagraphs. 
The basic principle behind a collagraph 
is that of relief printing.

Some artists distinguish between a "collage relief print" and a collagraph, the latter of which is then termed an intaglio print. (If the collaged plate is inked up and then wiped of most of the ink on its uppermost surfaces, it is then run through an etching press with dampened paper. Recessed areas or indentations in the plate hold the ink and thus print on the paper.) Some printmakers combine both methods, intaglio wiping and rolling surface color onto the plate.

For our purposes, we'll refer to collage relief prints as collagraphs. Materials with different surfaces and textures are assembled on a flat base (called the plate). The base is often made of Masonite, wood, sheet metal, or heavy cardboard. Objects in low relief are first glued to the rigid backing. The heights of the various materials should be somewhat similar--there shouldn't be too much difference in elevation. Put down newspapers or plastic to shield the work area.


tute, create a collagraph print
Simple collagraph printing plate before being inked up and used.

Possible Materials for Collagraphs:
Woven fabric
Lace
Doilies
Rickrack
Embroidery
Braid
Buttons
Toothpicks
Clock parts
Gaskets
Sandpaper
Coins
Textured wallpaper
String
Feathers
Washers
Flat rubber pieces
Mesh
Corrugated cardboard
Screening

Flattened plants

When the glue is dry, you can make the printing plate more long-lasting
with a coat of gesso, varnish, or acrylic medium. (Varnish is a protectant,
usually clear, that may also affect the sheen of the surface.)

When the sealant has cured, select a soft but strong printing paper.                                         

Printing the Relief Plate: 

Water-based block printing ink cleans up easily later. Squeeze ink onto a glass slab and smooth it out with a brayer. Ink up all the raised areas on the collagraph plate evenly with a brayer (an ink roller) . Varied heights require careful inking. If you miss any areas, try daubing ink on the printing surface with a brush or a piece of felt.
Quickly place a clean sheet of printing paper on the inked surface. If the paper is thin, cover it with another sheet of paper before you begin rubbing. Press over it with your fingers and the flat of your hand, gently rubbing to transfer the ink to the paper. Take care to keep from tearing the printing paper. Finish by rolling a clean brayer over the paper with as much pressure as possible without damaging the paper. Peel the paper carefully from the plate and set aside (or hang it up) to dry.

The printing plate is usually, but not always, re-inked for each impression. Sometimes enough ink remains on the plate that another print, a "ghost" image, can be made.

Variations include making a multi-colored print by inking up various parts of the plate in different colors, or printing only some elements separately on the same sheet of paper. You can even add more color by hand after the print is dry! 

found objects
The same plate was printed 4 times on one paper.


(For an interesting and unusual result, overprint several different collagraph plates to create a single artwork on the same sheet of paper.)


Paula Guhin
art blog

Monday, April 1, 2013

THREE MIXED-MEDIA COLLAGES & A WINNER ANNOUNCED!

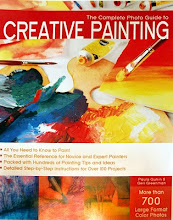
Last week's giveaway contest was won by Scrapper Jude, whose name was randomly selected. Congrats to the winner, who will receive a brand new copy of the Creative Painting book! 
the complete photo guide to creative painting
Art Book Prize

Scrapper Jude, please privately contact me with your postal mailing address. And my thanks go to everyone else who participated, too. Please watch for another freebie contest in a future post.


THREE COLLAGES WITH NATURAL OR FOUND MATERIALS

The first, below, includes a vintage book page, a real feather, and a piece of natural bone. I also added acrylic paint and a transfer.
transfer, acrylics
Injurious Insects, 9 x 12" by P. Guhin
This piece, with a "flying" theme, also uses bird's feathers, images, and acrylics. I incorporated fibers as well.
collage, painting
Original collage/painting
>
Finally, the collage/painting below is the most dimensional of the three, and the most textured.
I added gritty fillers to acrylic mediums, and found pieces of roadside trash with which to build up key areas.
non-objective, textured
9 x 13"
It's a non-objective work that I sealed with matte medium.