Friday, March 22, 2013

GIVEAWAY - BLOG CANDY CONTEST - FREEBIE FOR A FOLLOWER!

(This contest is now closed, but there will be others!)
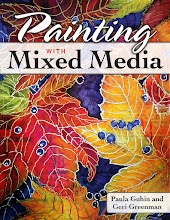
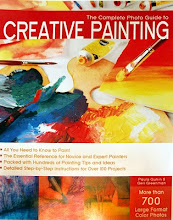
I appreciate my followers and want to reward such loyalty with an art book, brand new, to the one whose name is drawn at random when the contest ends.

This big, beautiful freebie is for a follower of this blog, so if you must sign up now to qualify, please do! It's my hope that you stay with me for future giveaways, too. 
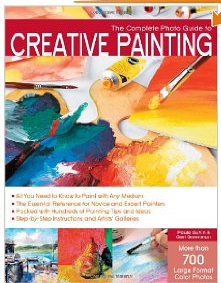
art book, book on painting
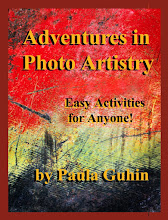
This art book includes all the major paint media!


All the usual rules apply: Leave a comment below, at this post. If you win, you must privately send me your postal address within a reasonable time. I will not use the address for any purpose other than to send you the book. I will announce the winner's name in a future post, likely between March 30-April 1, 2013. Thanks in advance for participating!

mixed media art blog

Saturday, March 16, 2013

CREATE A TWO-PART PAINTING!

A 2-in-One Collage/Painting is Cool
MAKE A HUMDINGER WITH HINGES!

Materials:
  • 2 sizes stretched canvas
  • 2 sets hinges
  • screwdriver
  • paints, adhesives, brushes, images, text, art papers, assorted embellishments
  • cupboard handle or knob (optional)
Here's your opportunity to work on FOUR sides 
and create a work of art that can be viewed a number of 
ways! Paint, texture, and collage the backs 
of the canvases, too! Then join the two together 
so that the assemblage can free-stand if so desired. 
But the piece can be wall-hung too!
It's a versatile work. Be sure that wherever you're 
working, front or back, you unify the parts, 
making sure they look good together.
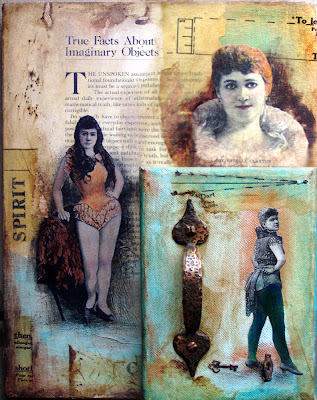
Note the handle on my example, below. 
A knob would have worked too.  
assemblage, tutorial, how-to paint
Viewers can pull the handle and open the 2-canvas piece!
This piece opens to reveal what you can't see 
in the single view here. And the back of the large 
canvas was finished properly, too! 
(I.E., turn the whole thing backwards and 
extend the small canvas, 
and you have a whole 'nother artwork!)


Friday, March 8, 2013

ALTER METAL-LEAF WITH THIS TECHNIQUE


"LEAF" IT TO METALLIC FOIL!  
Want to "foil around" and create an effect to use with paintings, collages, and more?

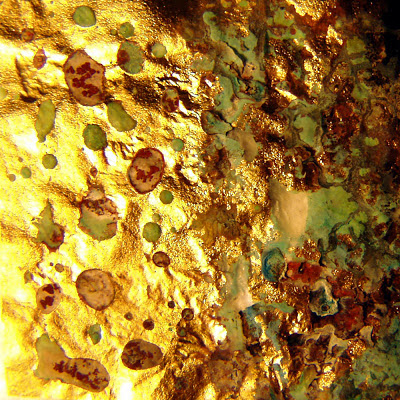
I used a rub-on sheet of gold leaf, shown below, and patina solution.
metallic foil, antique effect
Gold leaf as rub-on sheets.
tute, how-to, how to
Other patina solutions are available, too!
Caution: the antiquing solution eats through aluminum foil, so use plastic, waxed paper, shelf paper, or layers of old newspapers on your working surface!

In my experiment, I applied the copper metallic surfacer paint to the right side of my gold leaf paper, and the patina green solution directly to the left half.
mixed media, art paper, technique
I prefer the right side, using both the coppery surfacer and the patina product.
 When the coppery paint was still tacky, not dry, I applied the patina solution to that side as well. Both sides were left overnight to dry.

Above is the result. Since it would flake off and perhaps tarnish, I sealed the surface with a spray varnish.


mixed media art blog

blogspot art blog


Saturday, March 2, 2013

THIS TRANSFER TECHNIQUE IS SOOOO EASY!

Make a painting that's also a monoprint.

It's fun, and the results are really cool.

MATERIALS:
    • Paintbrushes
    • Acrylic paint
    • Clear acetate sheet, glossy
    • Polymer medium or soft gel
    • Receiving surface (paper or canvas)

      tute, how to, painting method
      Even a plastic page protector will do!
       
    FIRST, paint the acetate as desired. You can roller some paint onto it, brush the paint on, stamp designs onto it, whatever you like! You can even scratch some of the paint off if you want. Permanent markers can be used, too.
    
    mixed media, transfer
    I used a brayer to apply paint to the plastic, too!
    
    monoprint, method, how-to
    Even the permanent marker will transfer later!
    
    Here I began creating a simple, non-objective design as a background on the plastic sheet.
    NOTE: whatever you paint will be reversed later, so names, words, or most numbers would be backwards in the finished piece.
    THEN let the acrylic paint dry.

    NEXT, brush clear acrylic medium or gel onto the receiving surface. (I used heavy paper.) Before it can dry, lay the acetate, painted side down, onto the wet surface. Smooth it down thoroughly. Let dry overnight.
    
    easy art method, monoprint how-to
    I used matte medium, but the acetate imparted a nice high-shine gloss to the finished painting!
    GENTLY peel the acetate off and you'll be delighted that the paint design has now transferred to the surface.
     Be aware that, as with most types of transfers, bits of the original design may not re-locate. You may wish to repeat the process with new elements and layer them onto the previous, dry design, as I did in the completed work below.
    
    easy art method, simple painting technique
    This finished non-objective painting was done with two layers (using the acetate transfer method twice).

    Thanks for visiting my blog! Please leave a comment if you can.